Category Archives: Fedora

mingw-bundledlls – Automatically bundle DLLs for Windows deployment

Download the script – https://github.com/mpreisler/mingw-bundledlls

I recently had to build an application with mingw32 on Fedora 21 and then prepare the binaries for usage on Windows without any external dependencies.

In the past I used to look at the list of dependencies using depends32.exe or similar tools on Windows and then copy all the DLLs manually. Needless to say that is very repetitive work and gets annoying quickly. Googling for existing solutions did not yield any useful results so I decided to solve this myself.

The solution I came up with is a small Python 3 script that uses objdump  to recursively gather all dependencies of an executable file (WinPE EXE) or a dynamic loaded library (DLL). I published the script on GitHub – https://github.com/mpreisler/mingw-bundledlls.

The script can be run from Linux and only depends on python3 and objdump from binutils. It is very convenient to just run:

mingw32-configure && make && mingw-bundledlls --copy $EXE

After this invocation all the necessary DLLs will be right next to the EXE so you can just pack it all up and upload the release.

Practical example

I will show how I build SCAP Workbench for Windows from scratch on Fedora 21.

git clone https://github.com/OpenSCAP/scap-workbench.git
cd scap-workbench
mkdir build
cd build
mingw32-cmake ../
make -j 4

After the previous command finishes build/scap-workbench contains all the necessary resources including scap-workbench.exe. You however cannot run it on Windows without getting an error message about missing DLLs. Let us now run the script to solve that 🙂

$ mingw-bundledlls ./scap-workbench/scap-workbench.exe

Found the following dependencies:

/usr/i686-w64-mingw32/sys-root/mingw/bin/libstdc++-6.dll
/usr/i686-w64-mingw32/sys-root/mingw/bin/libpng16-16.dll
/usr/i686-w64-mingw32/sys-root/mingw/bin/zlib1.dll
/usr/i686-w64-mingw32/sys-root/mingw/bin/libcurl-4.dll
/usr/i686-w64-mingw32/sys-root/mingw/bin/libwinpthread-1.dll
/usr/i686-w64-mingw32/sys-root/mingw/bin/libxslt-1.dll
/usr/i686-w64-mingw32/sys-root/mingw/bin/QtGui4.dll
/usr/i686-w64-mingw32/sys-root/mingw/bin/iconv.dll
/usr/i686-w64-mingw32/sys-root/mingw/bin/libxml2-2.dll
/usr/i686-w64-mingw32/sys-root/mingw/bin/libidn-11.dll
/usr/i686-w64-mingw32/sys-root/mingw/bin/libintl-8.dll
/usr/i686-w64-mingw32/sys-root/mingw/bin/libopenscap-8.dll
/usr/i686-w64-mingw32/sys-root/mingw/bin/libcrypto-10.dll
/usr/i686-w64-mingw32/sys-root/mingw/bin/QtNetwork4.dll
/usr/i686-w64-mingw32/sys-root/mingw/bin/libexslt-0.dll
/usr/i686-w64-mingw32/sys-root/mingw/bin/libssh2-1.dll
/usr/i686-w64-mingw32/sys-root/mingw/bin/QtXmlPatterns4.dll
/usr/i686-w64-mingw32/sys-root/mingw/bin/libgcc_s_sjlj-1.dll
/usr/i686-w64-mingw32/sys-root/mingw/bin/libpcre-1.dll
/usr/i686-w64-mingw32/sys-root/mingw/bin/QtCore4.dll
/usr/i686-w64-mingw32/sys-root/mingw/bin/libssl-10.dll

After confirming that the script did not find anything crazy we can proceed to copy the dependencies next to the exe. Use –copy as an option to accomplish that.

$ mingw-bundledlls --copy ./scap-workbench/scap-workbench.exe

Copying enabled, will now copy all dependencies next to the exe_file.

Copying '/usr/i686-w64-mingw32/sys-root/mingw/bin/libidn-11.dll' to './scap-workbench/libidn-11.dll'
Copying '/usr/i686-w64-mingw32/sys-root/mingw/bin/libssh2-1.dll' to './scap-workbench/libssh2-1.dll'
Copying '/usr/i686-w64-mingw32/sys-root/mingw/bin/libwinpthread-1.dll' to './scap-workbench/libwinpthread-1.dll'
Copying '/usr/i686-w64-mingw32/sys-root/mingw/bin/libxml2-2.dll' to './scap-workbench/libxml2-2.dll'
Copying '/usr/i686-w64-mingw32/sys-root/mingw/bin/QtNetwork4.dll' to './scap-workbench/QtNetwork4.dll'
Copying '/usr/i686-w64-mingw32/sys-root/mingw/bin/libstdc++-6.dll' to './scap-workbench/libstdc++-6.dll'
Copying '/usr/i686-w64-mingw32/sys-root/mingw/bin/zlib1.dll' to './scap-workbench/zlib1.dll'
Copying '/usr/i686-w64-mingw32/sys-root/mingw/bin/libopenscap-8.dll' to './scap-workbench/libopenscap-8.dll'
Copying '/usr/i686-w64-mingw32/sys-root/mingw/bin/libpcre-1.dll' to './scap-workbench/libpcre-1.dll'
Copying '/usr/i686-w64-mingw32/sys-root/mingw/bin/libgcc_s_sjlj-1.dll' to './scap-workbench/libgcc_s_sjlj-1.dll'
Copying '/usr/i686-w64-mingw32/sys-root/mingw/bin/QtXmlPatterns4.dll' to './scap-workbench/QtXmlPatterns4.dll'
Copying '/usr/i686-w64-mingw32/sys-root/mingw/bin/libexslt-0.dll' to './scap-workbench/libexslt-0.dll'
Copying '/usr/i686-w64-mingw32/sys-root/mingw/bin/libcurl-4.dll' to './scap-workbench/libcurl-4.dll'
Copying '/usr/i686-w64-mingw32/sys-root/mingw/bin/libpng16-16.dll' to './scap-workbench/libpng16-16.dll'
Copying '/usr/i686-w64-mingw32/sys-root/mingw/bin/QtCore4.dll' to './scap-workbench/QtCore4.dll'
Copying '/usr/i686-w64-mingw32/sys-root/mingw/bin/libssl-10.dll' to './scap-workbench/libssl-10.dll'
Copying '/usr/i686-w64-mingw32/sys-root/mingw/bin/libxslt-1.dll' to './scap-workbench/libxslt-1.dll'
Copying '/usr/i686-w64-mingw32/sys-root/mingw/bin/libcrypto-10.dll' to './scap-workbench/libcrypto-10.dll'
Copying '/usr/i686-w64-mingw32/sys-root/mingw/bin/QtGui4.dll' to './scap-workbench/QtGui4.dll'
Copying '/usr/i686-w64-mingw32/sys-root/mingw/bin/iconv.dll' to './scap-workbench/iconv.dll'
Copying '/usr/i686-w64-mingw32/sys-root/mingw/bin/libintl-8.dll' to './scap-workbench/libintl-8.dll'

The script also runs upx on all the binaries if –upx is supplied. That is useful for minimizing installed size of your application.

At this point I just zip build/scap-workbench and test it on Windows.

Runtime loaded DLLs

The script will not find any runtime loaded dependencies. Doing that would be possible by looking for LoadLibrary, LoadLibraryEx, … calls but probably not worth it. Bundling runtime loaded DLLs is a potential nightmare depending on whether relative or absolute paths are used when calling LoadLibrary. Inevitably the script would have to alter the EXE itself or any of the DLLs that is calling LoadLibrary.

Since I did not need this I decided to ignore this issue 🙂
SCAP Workbench 1.1.0

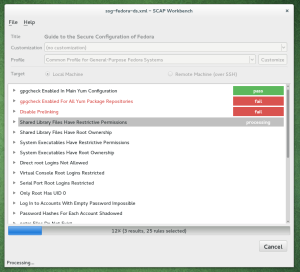
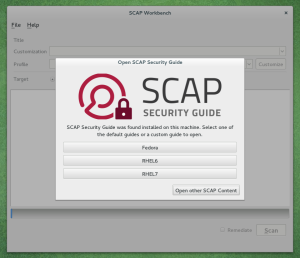
The new SCAP Workbench is out! This is the biggest release to date. We focused on improving the typical use-case of tailoring and remote scanning. This is also the first release to have Windows and MacOS X support!

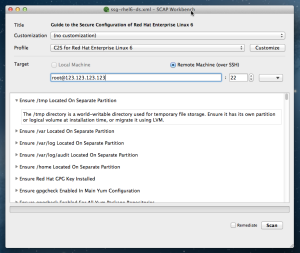
Update: Thanks to the great work of Jakub Jelen, we now have a testing release for Windows that supports remote scan! Give it a try, report any issues: scap-workbench-1.1.0-win32-remote-scan-testing.zip. SCAP Workbench 1.1.1 will be released some time soon and will have remote scanning from Windows included.

Fedora updates for F22, F21 and F20 are pending. Testing and karma would be greatly appreciated! This release brings so many fixes and does not break existing use-cases that I decided to push it to older Fedoras as well. Even though it is a major release.

Screenshots

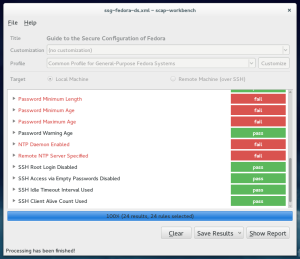
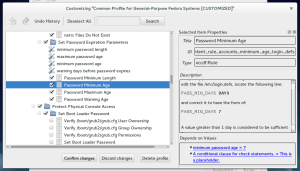
sw-1.1.0_1 sw-1.1.0_2

sw-1.1.0_3 sw-1.1.0_4

What’s new?

1.1.0 is a packed major release, the number of changes is second only to the 0.8.0 C++ rewrite.

  • Windows support – including a native MSI installer
  • MacOS X support – including a native dmg image
  • Complete redesign of the main window, with rich-text rule descriptions
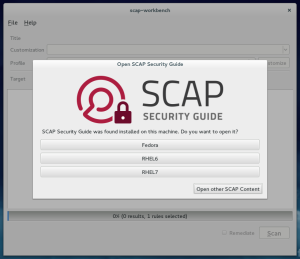
  • Better SCAP Security Guide integration
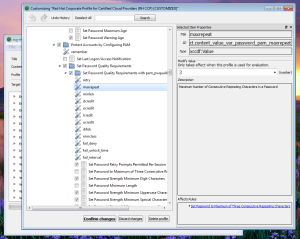
  • Tailoring window greatly improved – shows relationships between values and rules
  • Opens bzip2 files
  • Performance improvements when loading big SCAP files
  • Countless UX improvements
  • And a lot more, a total of 49 tickets fixed, plus fixes merged from maintenance branches

Where to report issues?

The best place to report issues is the trac bug tracker. However I also accept reports via the mailing list or even comments to this blog post.

SCAP Workbench 1.1.0rc1

Before I release the final 1.1.0 I wanted to make a release candidate with COPR repos for Fedora 20 and 21. This should be less painful than compiling everything from source so I am hoping to get more feedback and testing that way.

Feedback would be greatly appreciated. I expect to have a final release out by the end of February.

ssg_integration intro_screenshot tailoring_dialog_opened

What’s new?

1.1.0 will be a packed major release, the number of changes is second only to the 0.8.0 C++ rewrite.

  • Complete redesign of the main window, with rich-text rule descriptions
  • Better SCAP Security Guide integration
  • Tailoring window greatly improved – shows relationships between values and rules
  • Opens bzip2 files
  • Performance improvements when loading big SCAP files
  • Countless UX improvements
  • And a lot more, a total of 34 tickets fixed

How to test?

If you have x86_64 Fedora 20 or 21 you can just enable my COPR repo and install scap-workbench via yum or dnf.

# dnf install dnf-plugins-core

# dnf copr enable mpreisle/scap-workbench

# dnf install scap-workbench

Please consider also installing scap-security-guide to test the new integration dialog. We may opt to make scap-workbench depend on scap-security-guide for the final release but the decision has not been made yet.

# dnf install scap-security-guide

Otherwise you have to pull from the git repository or download the 1.1.0rc1 tarball and build workbench yourself.

Where to report issues?

The best place to report issues is the trac bug tracker. However I also accept reports via the mailing list or even comments to this blog post.


h.264 HTML5 video in Firefox on Fedora 20

Please check out rpmfusion.org for all the usual disclaimers. Some of the software needed for h.264 is for non-commercial use only and/or patent encumbered.

Fedora now ships with Firefox 31 that has gstreamer1 support enabled. That means that you can finally use HTML5 h264 video on youtube and vimeo if you install a few codecs. This snippet should work even on freshly installed Fedora 20.

This post should apply to other Linux distributions as well but the packages names will be different. Type about:buildconfig into the address bar in Firefox. If it contains –enable-gstreamer=1.0 you are good to go.

# only if you don't have rpmfusion enabled already
yum localinstall http://download1.rpmfusion.org/free/fedora/rpmfusion-free-release-$(rpm -E %fedora).noarch.rpm http://download1.rpmfusion.org/nonfree/fedora/rpmfusion-nonfree-release-$(rpm -E %fedora).noarch.rpm

yum install gstreamer1-libav gstreamer1-vaapi gstreamer1-plugins-{good,good-extras,ugly} -y

# only if you want bad plugins
# yum install gstreamer1-plugins-bad-free gstreamer1-plugins-bad-freeworld -y

Now restart Firefox and test the h264 support. You can use https://www.youtube.com/html5 for testing, the h264 bar should be green. Or try looking at any vimeo video.

If your firefox does not play h.264 videos at this point, check that you really installed gstreamer1 plugins and not the “gstreamer 0.10”. These are prefixed with just gstreamer- in Fedora.

UPDATE: This works on Fedora 21 as well.
UPDATE: This works on Fedora 22 as well.
UPDATE: This works on Fedora 23 as well.
UPDATE: This works on Fedora 24 as well.

Lenovo T440s Fedora 20 notes

All of this should apply to all T440s models but I have specifically tested it on a model with Samsung SSD and Intel 7260 dual band wifi.

Scary options in BIOS

All these remote management, anti-theft and device location options really just fuel my paranoia. Turned them all off. I try to setup all my machines to be disposable, device recovery is very unlikely anyway.

Good options in BIOS

You can nicely lock it down with a supervisor password and disallow booting from any device other than the internal SSD. There is an option to disallow firmware flashing. Getting the laptop apart to wipe the settings is quite a pain so I think this does help a bit.

UEFI boot and GPT

Before installing Fedora, go to the BIOS/UEFI setup menu and switch to the Startup tab. Look for “UEFI/Legacy boot” and set it to “UEFI only”. I have also disabled CSM but I don’t think it affects anything with Fedora 20.

I couldn’t get the local pxeboot running with UEFI so I had to resort to a USB flash drive. Had no problems getting the machine to boot the USB drive. Fedora 20 x86_64 install ISO was used mainly because I already had it downloaded from before.

Pay close attention to partitioning in Anaconda. If you want TRIM/discard select Standard Partitioning. Don’t worry about having to type your password multiple times for multiple encrypted standard partitions. Anaconda will do what you want by default – a single password opens all your encrypted partitions.

Despite everyone raging on the internet about SSD alignment it seems very unlikely that partitioning tools would do a bad job by default. In my case the internal Samsung SSD exported its geometry correctly and Anaconda had done proper partition alignment. You can check this using parted:

sudo parted /dev/sda
# interactive interface of parted follows
align-check opt
# now you can cycle through all the partitions
# all are aligned in my case

The rest of the installation process is a breeze, everything seems to work out of the box.

Is UEFI worth the hassle? Probably not, I was mainly curious. The boot seems a bit faster but I have no solid data.

TRIM/discard and HDD encryption

TRIM may help with SSD performance. It’s probably overkill and very overrated but for the sake of learning about it I opted to set it up. Be advised that enabling it may leak structure information about how you use your drives – especially how much free space you got. See http://asalor.blogspot.cz/2011/08/trim-dm-crypt-problems.html for more details. Now that all the disclaimers are done, let us set up discard for encrypted drives.

The actual process was very simple, first you need to tell cryptsetup to allow discard to be enabled. Open /etc/crypttab and add “luks,discard” to each drive that is relevant. The end result should look like this:

luks-................... UUID=................... none luks,discard

I am not entirely sure if adding luks is necessary here but I do it anyway. The “luks” option forces LUKS mode. Now you can enable the discard option in /etc/fstab, add “discard” to the list of options in the relevant mount points. The end result should look something like this:

$some_device_depending_on_your_setup /mount/point ext4 defaults,noatime,noadirtime,discard,x-systemd.device-timeout=0 1 2

To make these changes effective on next boot you have to regenerate initramfs.

mount /boot
dracut --force

Testing with fstrim:

sudo fstrim /
sudo fstrim /home

Getting the function keys to work

If you use a big bulky desktop environment like KDE or Gnome this may already work out of the box. I use i3wm so I have to set it up manually.

Install the necessary dependencies:

sudo yum install xbacklight pulseaudio-utils

This is what I put into my i3config, should be easy to adapt for other window managers. It’s a bit messy and I may improve it later but it gets the job done for now. It has basic support for volume up, volume down, mute toggle, brightness up and brightness down.

bindsym XF86AudioLowerVolume exec /usr/bin/pactl set-sink-volume 0 -- '-5%' && notify-send --urgency=low --expire-time=1000 "`pactl list sinks | grep "Volume: " | grep -v "Base" | tr -d '\t'`"
bindsym XF86AudioRaiseVolume exec /usr/bin/pactl set-sink-volume 0 -- '+5%' && notify-send --urgency=low --expire-time=1000 "`pactl list sinks | grep "Volume: " | grep -v "Base" | tr -d '\t'`"
bindsym XF86AudioMute exec /usr/bin/pactl set-sink-mute 0 toggle && notify-send --urgency=low --expire-time=1000 `pactl list sinks | grep "Mute: " |  tr -d '\t'`

bindsym XF86MonBrightnessUp exec /usr/bin/xbacklight -inc 10 && notify-send --urgency=low --expire-time=1000 "Backlight `xbacklight`%"
bindsym XF86MonBrightnessDown exec /usr/bin/xbacklight -dec 10 && notify-send --urgency=low --expire-time=1000 "Backlight `xbacklight`%"

Get more out of the battery

Append the following to /etc/rc.d/rc.local:

echo '1500' > /proc/sys/vm/dirty_writeback_centisecs
echo 'min_power' > /sys/class/scsi_host/host0/link_power_management_policy
echo 'min_power' > /sys/class/scsi_host/host1/link_power_management_policy
echo 'min_power' > /sys/class/scsi_host/host2/link_power_management_policy
# some people have problems with this and get hissing noises
# I don't so I enable power save even for Intel HDA Audio
echo '1' > /sys/module/snd_hda_intel/parameters/power_save'
echo '0' > /proc/sys/kernel/nmi_watchdog'
echo 'auto' > /sys/bus/usb/devices/2-6/power/control'
echo 'auto' > /sys/bus/usb/devices/2-7/power/control'
echo 'auto' > /sys/bus/pci/devices/0000:00:1f.3/power/control
echo 'auto' > /sys/bus/pci/devices/0000:00:00.0/power/control
echo 'auto' > /sys/bus/pci/devices/0000:00:03.0/power/control
echo 'auto' > /sys/bus/pci/devices/0000:00:02.0/power/control
echo 'auto' > /sys/bus/pci/devices/0000:00:16.0/power/control
echo 'auto' > /sys/bus/pci/devices/0000:00:16.3/power/control
echo 'auto' > /sys/bus/pci/devices/0000:03:00.0/power/control
echo 'auto' > /sys/bus/pci/devices/0000:02:00.0/power/control
echo 'auto' > /sys/bus/pci/devices/0000:00:1f.0/power/control
echo 'auto' > /sys/bus/pci/devices/0000:00:1d.0/power/control
echo 'auto' > /sys/bus/pci/devices/0000:00:1c.1/power/control
echo 'auto' > /sys/bus/pci/devices/0000:00:1c.0/power/control
echo 'auto' > /sys/bus/pci/devices/0000:00:1b.0/power/control
echo 'auto' > /sys/bus/pci/devices/0000:00:14.0/power/control
echo 'auto' > /sys/bus/pci/devices/0000:00:19.0/power/control
echo 'auto' > /sys/bus/pci/devices/0000:00:1f.2/power/control
# your ethernet may be called differently
ethtool -s em1 wol d

Creating the file will automatically enable the rc-local.service unit in systemd. There is no need to enable it manually. You can verify this by running:

systemctl show rc-local.service

You can get amazing battery life out of this machine. 15+ hours is not a problem with moderate usage (with internal and 6 cell battery).

The LCD panel woes

The Full HD IPS T440s ship with 2 different LCD panels – AUO and LG. You can look up which one you got by grepping /var/log/Xorg.0.log. If it contains LP140WF1 you got what everyone considers the worse display – the LG. B140HAN01.2 is the AUO. You can read a lot of endless first world problem style whining about this here.

Outstanding issues

DisplayPort MST

All the video output ports on the dockstation are mirrored.
https://bugzilla.redhat.com/show_bug.cgi?id=1086978

As a workaround you can use the mini DisplayPort on the laptop itself even when the laptop is docked. The VGA port on the laptop unfortunately cannot be used. From what I can tell it is disabled when you put the laptop into the dockstation. Makes sense but why isn’t the miniDP disabled?

dockstation audio jack

https://bugzilla.redhat.com/show_bug.cgi?id=1101386

Use the laptop combo audio port as a workaround. Works even when docked.

Fingerprint reader

… but who cares?

If bluetooth doesn’t work and the device doesn’t show up in `lsusb` it could be because you disabled the Fingerprint reader. Enable it to get bluetooth back. This issue could be specific to my firmware version 2.27.

TODO

  • Toggle all radio off with the wifi function key – just binding the key to nmcli radio all off works but doesn’t toggle
  • SecureBoot