Many users customize their SCAP content before use. Usually they use SCAP Workbench. When they are done they end up with the original source datastream and a customization file. If they are scanning using the oscap tool or SCAP Workbench they can use them as they are. If they are however using Red Hat Satellite 6 to do their SCAP scans they cannot upload the 2 files to form a single policy. Instead they need to somehow combine the tailoring and datastream to get a single file. In this blog post we will explore how to do just that.
Option 1: Manual surgery (not recommended)
The first option is to take the Profile from the tailoring file and insert it into the XCCDF Benchmark. Let us see how the tailoring file looks like:
<?xml version="1.0" encoding="UTF-8"?>
<xccdf:Tailoring xmlns:xccdf="http://checklists.nist.gov/xccdf/1.2" id="xccdf_scap-workbench_tailoring_default">
  <xccdf:benchmark href="/usr/share/xml/scap/ssg/content/ssg-fedora-ds.xml"/>
  <xccdf:version time="2016-05-26T14:15:02">1</xccdf:version>
  <xccdf:Profile id="xccdf_org.ssgproject.content_profile_common_customized" extends="xccdf_org.ssgproject.content_profile_common">
    <xccdf:title xmlns:xhtml="http://www.w3.org/1999/xhtml" xml:lang="en-US">Common Profile for General-Purpose Fedora Systems [CUSTOMIZED]</xccdf:title>
    <xccdf:description xmlns:xhtml="http://www.w3.org/1999/xhtml" xml:lang="en-US">This profile contains items common to general-purpose Fedora installations.</xccdf:description>
    <xccdf:select idref="xccdf_org.ssgproject.content_rule_package_aide_installed" selected="true"/>
  </xccdf:Profile>
</xccdf:Tailoring>
In the example above I have created a really small tailoring file which selects one extra rule in the Fedora common profile from SCAP Security Guide. The most important part of the tailoring file are the Profiles. In our example it’s just the one xccdf_org.ssgproject.content_profile_common_customized profile. Let us copy the entire <xccdf:Profile> element into the clipboard.
If we look at a source datastream file things get a lot more complicated. There are catalogs, checklists, checks, extended components and all sorts of other things. Let us assume that our datastream only contains one XCCDF Benchmark. We first need to find it. Look for the <xccdf:Benchmark> element. Keep in mind that the XML namespace prefixes may differ depending on where you got the content.
<ds:component id="scap_org.open-scap_comp_ssg-fedora-xccdf-1.2.xml" timestamp="2016-05-10T14:08:41"><Benchmark xmlns="http://checklists.nist.gov/xccdf/1.2" id="xccdf_org.ssgproject.content_benchmark_FEDORA" resolved="1" xml:lang="en-US" style="SCAP_1.2">
  <status date="2016-05-10">draft</status>
  <title xml:lang="en-US">Guide to the Secure Configuration of Fedora</title>
  <description xml:lang="en-US">This guide presents a catalog of security-relevant configuration
settings for Fedora operating system formatted in the eXtensible Configuration
Checklist Description Format (XCCDF).
<html:br xmlns:html="http://www.w3.org/1999/xhtml"/>
<html:br xmlns:html="http://www.w3.org/1999/xhtml"/>
Providing system administrators with such guidance informs them how to securely
configure systems under their control in a variety of network roles.  Policy
OK, so we have found the Benchmark! That’s the hardest part of this whole operation. We now need to find a good place to insert the Profile element. I like to insert tailored profiles as the last Profile in the benchmark. This ensures that the profiles they are derived from come first.
    <refine-value idref="xccdf_org.ssgproject.content_value_var_accounts_password_warn_age_login_defs" selector="7"/>
    <refine-value idref="xccdf_org.ssgproject.content_value_var_auditd_num_logs" selector="5"/>
    <refine-value idref="xccdf_org.ssgproject.content_value_sshd_idle_timeout_value" selector="5_minutes"/>
  </Profile>
  ... INSERT HERE ...
  <Group id="xccdf_org.ssgproject.content_group_intro">
    <title xml:lang="en-US">Introduction</title>
    <description xml:lang="en-US">
Insert the Profile, make sure you add the namespace declaration if necessary, save the file and we are done! We can now upload this file to Satellite 6 and use our customized profile.
Option 2: Use a script
I have written a small Python helper script that does this entire surgical operation for you. Check it out at https://github.com/mpreisler/combine-tailoring.
Usage:
./combine-tailoring.py ssg-fedora-ds.xml ssg-fedora-ds-tailoring.xml --output o.xml
It is a quick and dirty script, pull requests welcome.
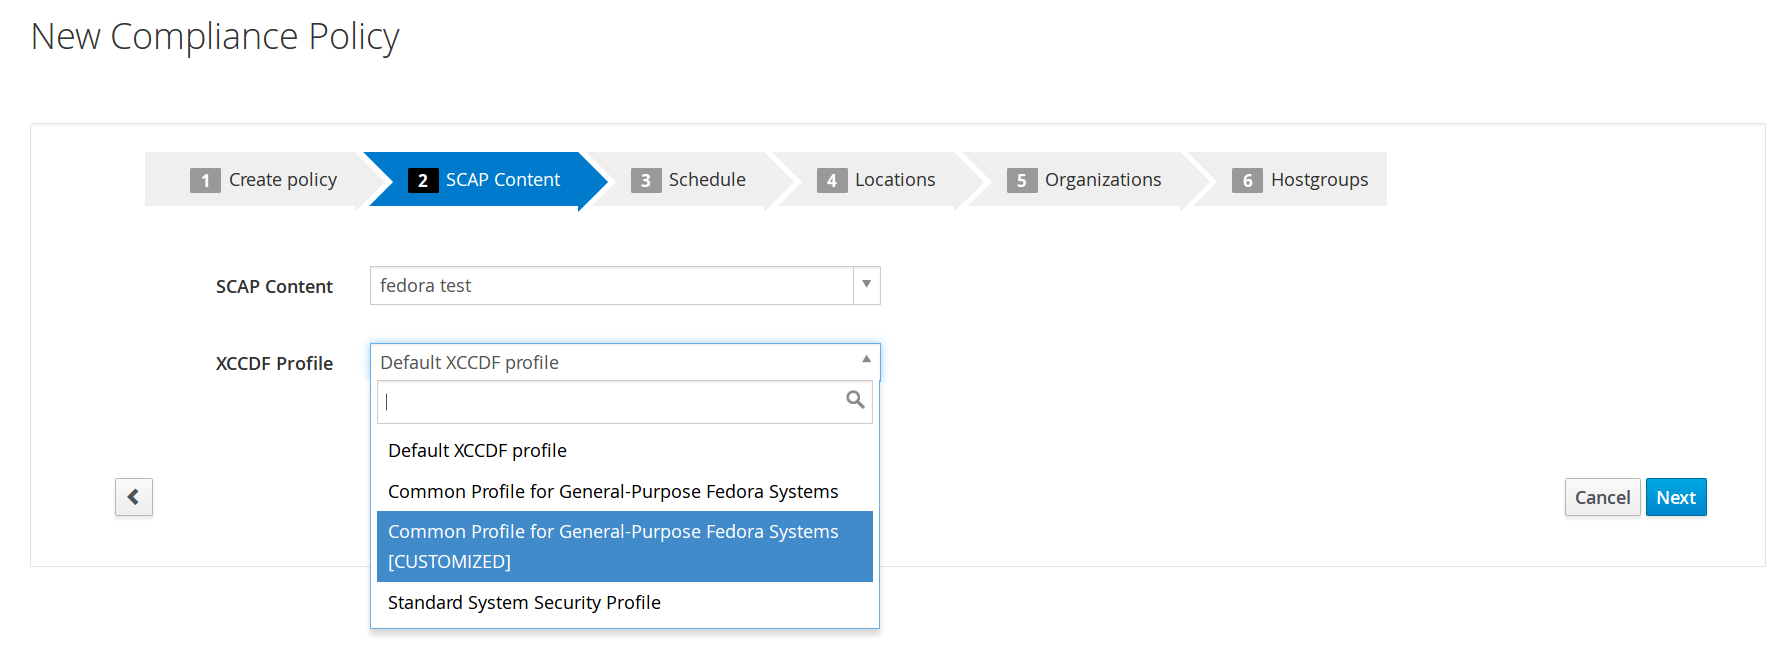
The resulting file can be used in Satellite 6 and the customized profile will show up.